-
리덕스만으로 todo 만들기Redux 2022. 7. 27. 21:33
<h1>To Dos</h1>
    <form>
      <input type="text" placeholder="Write to do" />
      <button>Add</button>
    </form>
<ul></ul>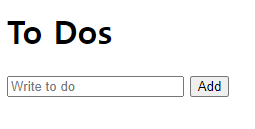
html을 짜주고,
리덕스로 상태관리를 할 수 있게 해보자.
import { createStore } from "redux";

const form = document.querySelector("form");
const input = document.querySelector("input");
const ul = document.querySelector("ul");
먼저, 각각의 태그를 잡아주고,
const reducer = (state = [], action) => {
    switch(action.type) {
        case ADD_TODO://...state를 뒤로보내면 순서바뀜 치는게 아래로 내려가게
            return [...state, { text: action.text, id: Date.now()}];
        case DELETE_TODO:
            return state.filter(toDo => toDo.id !== action.id);
        default:
            return state;
    }
};

const store = createStore(reducer);

store.subscribe( () => console.log(store.getState()));

const addToDo = text => {
    store.dispatch({ type: ADD_TODO, text });
}

const deleteToDo = e => {
    const id = parseInt(e.target.parentNode.id);
    store.dispatch({ type: DELETE_TODO, id });
}

const paintToDos = () => {
    const toDos = store.getState();
    ul.innerHTML = ""
    toDos.forEach(toDo => {
        const li = document.createElement("li");
        const btn = document.createElement("button");
        btn.innerText = "DEL";
        btn.addEventListener('click',deleteToDo)
        li.id = toDo.id;
        li.innerText = toDo.text;
        li.appendChild(btn)
        ul.appendChild(li);
    })
}

store.subscribe(paintToDos);

const onSubmit = e => {
    e.preventDefault();
    const toDo = input.value;
    input.value = "";
    addToDo(toDo);
};

form.addEventListener("submit", onSubmit);
ADD_TODO와 DELETE_TODO action을 만들어준다.
그리고, onSubmit라는 함수를 만들어서, 일단은 서버에 보내는걸 막아주고, input에 입력값을 toDo라는 변수에 담고, 입력란을 비워주고, dispatch로 text: toDo라는 데이터를 보내주게끔 코드를 짠다.
여기서, case ADD_TODO일 때, return에 []로 비워져 있는데, 여기에 데이터를 넣을 때, state.push(action.text)로 직접 넣는 mutation은 하면 안된다. 새로운 array를 만들어서 return해줘야한다.
그래서 return으론
return [...state, { text: action.text, id: Date.now()}];이렇게, ...state와 넣고싶은 data를 넣어서 합쳐주면 된다.
그리고, case DELETE_TODO일 때, return엔 filter를 이용해서 새로운 array를 만들어주게끔 한다. filter에는 toDo 즉, input에 입력된 Date.now()의 id가 action의 id 즉, 현재 클릭한 버튼의 부모요소인 li태그에 달린 id를 제외한 나머지만 array에 담기게끔 하면 된다.
return state.filter(toDo => toDo.id !== action.id);그리곤 subcribe 이용해 store.getState()를 즉, reducer의 return값들을 보여주게 할 수 있다.
store.subscribe( () => console.log(store.getState()));그리고, reducer에 보낼 action type을 지정해줘야 하니까, addToDo와 deleteToDo라는 dispatch함수를 만들어준다.
addToDo는 type: ADD_TODO이고, text라는 파라미터를 그대로 보내준다.
deleteToDo는 현재 DEL이 적힌 btn을 눌렀을 때, 부모요소인 li의 id값을 저장하고
type:DELETE_TODO이고, id를 같이 보내준다.
그리고, paintToDos라는 함수를 만들어서, 화면에 표시할 ui를 만들어준다.
먼저, store에 저장되는 data들을 가져와서 toDos변수에 담아주고,
toDos에 담긴 data만큼 반복되게 forEach를 써주고, li와 btn태그를 만들어주며, btn에는 DEL의 text와 누르면 dispatch함수가 실행되게 해주고, li에는 id와 input값이 입력되게 toDo.text를 넣어준다. 그리고, 각각 appendChild로 자리를 잡아주고,
2개 이상 입력하면, 2개 3개가 한꺼번에 보여지니 ul태그의 text를 할 때마다 없애주면 된다.
이제, store에 subscribe에 paintToDos함수를 넣어서, input값이 변하면 addToDo dispatch가 작동되며, subscribe가 실행되게 담아준다.
'Redux' 카테고리의 다른 글
Redux Toolkit(create Action) (0) 2022.07.29 mapStateToProps와 mapDispatchToProps (0) 2022.07.28 개선사항 (0) 2022.07.27 subscribe (0) 2022.07.27 action (0) 2022.07.27